You have cleaned the wall. It looks clean. You apply the paint. It goes on beautifully. Three months later, you walk into the room (or look at the exterior of your house) and see the paint bubbling, cracking, or peeling off in sheets.
Why did it fail? Because you painted over a surface that couldn't support the weight of the new coat. You cannot judge a wall just by looking at it. You need to test the adhesion integrity.
You don't need expensive equipment for this. You just need a roll of duct tape or masking tape. Here is how to perform "The Tape Test" - the 10-second check that saves you from doing the job twice.
1. Why Paint Fails
Paint relies on Adhesion. It needs to bond physically to the substrate beneath it. If that substrate is "Friable" (powdery, chalky, or loose), the paint will stick to the dust, not the wall. When the paint dries and shrinks (cures), it creates tension. If that tension is stronger than the dust holding it to the wall, it snaps off.
2. How to Perform the Test
This test works on interior plaster, exterior render, old paint, and bare brick.
Step 1: The "X" Cut (Optional but Recommended)
For a thorough test, use a utility knife to lightly score an "X" into the existing paint or surface. This exposes the edges of the old coating.
Step 2: Apply the Tape
Take a strip of strong adhesive tape (Standard Masking Tape is okay for interiors; Duct Tape is better for exteriors). Stick it firmly over the area. Rub it with your thumb to ensure it is 100% adhered to the surface.
Step 3: The Rip
Wait 10 seconds. Pull the tape off quickly and aggressively, at a 45-degree angle.
3. Interpreting the Results
Turn the tape over and look at the sticky side. This is your diagnosis.
Scenario A: The Tape is Clean
-
Visual: The sticky side looks like new tape. Maybe a few specks of dirt.
-
Diagnosis: Sound Surface.
-
Action: You are safe to paint. Just wash the wall down and start decorating.
Scenario B: The Tape is Dusty
-
Visual: The tape is covered in a fine white or grey powder (chalk). The adhesive feels "dead" because it's clogged with dust.
-
Diagnosis: Friable / Chalky. The surface has degraded (UV damage or old lime).
-
Action: Do NOT Paint. You must apply a Stabilising Solution (Primer) first to bind the dust. If you paint now, it will peel.
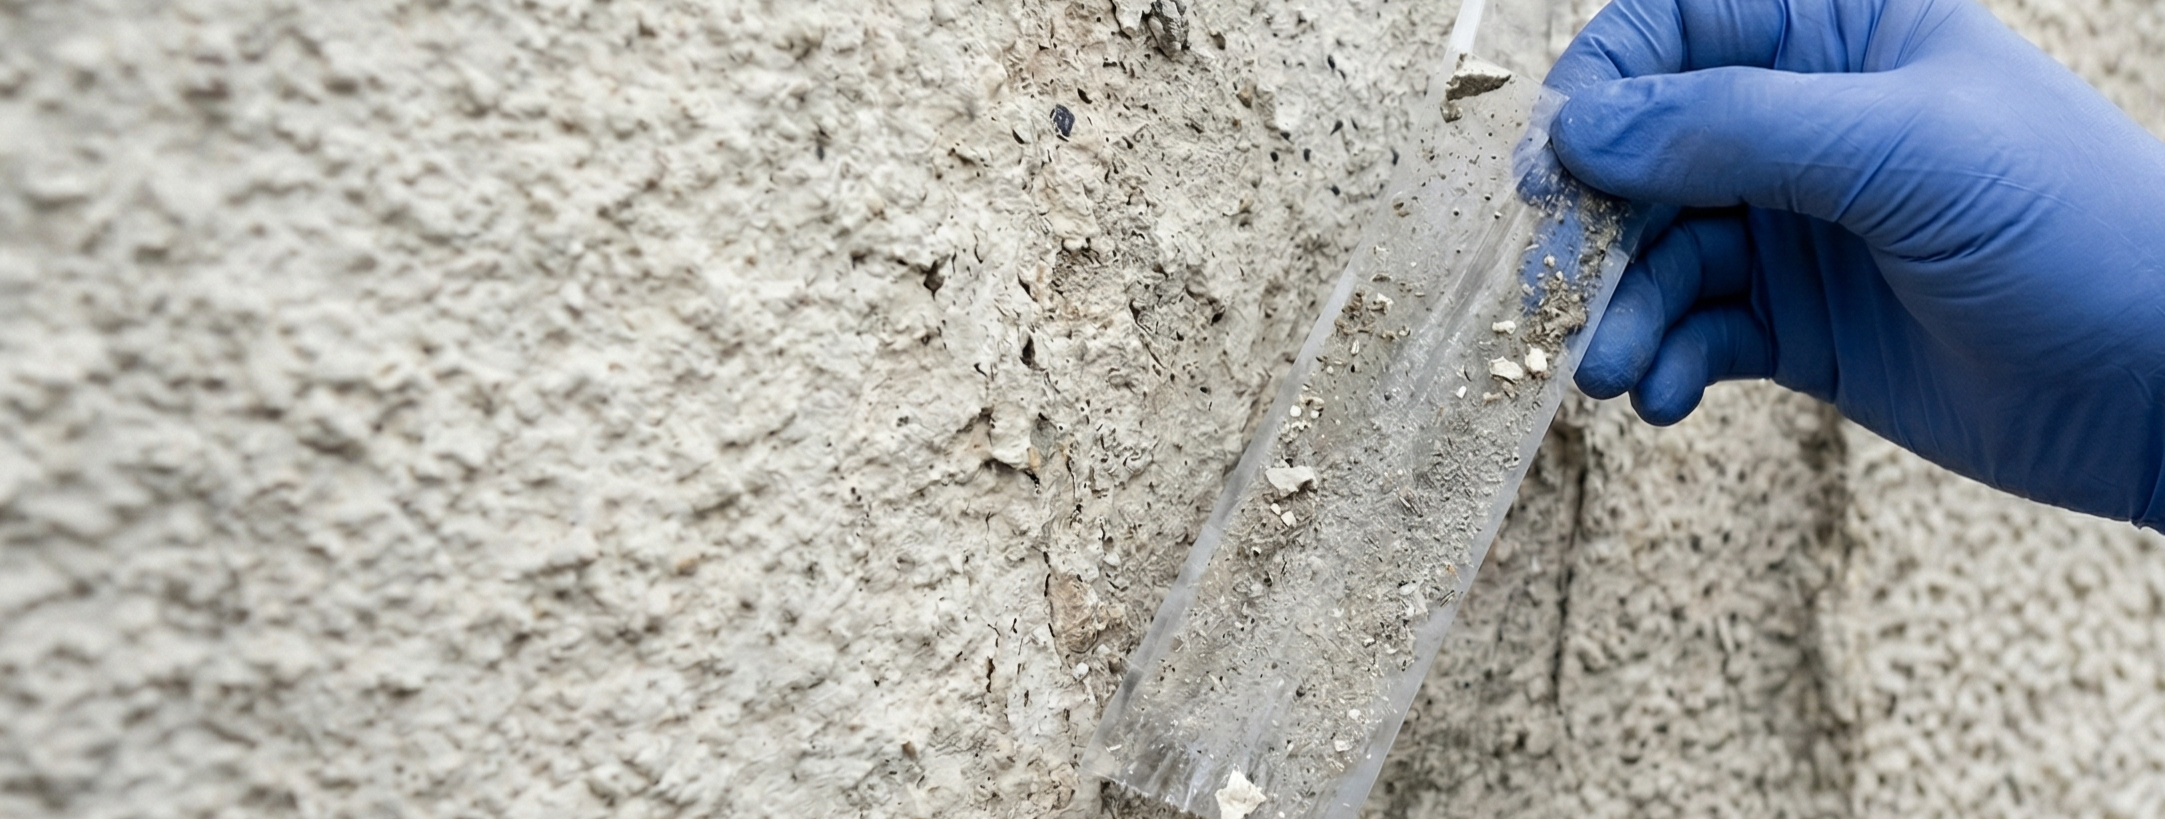
Scenario C: The Tape has Paint Chips
-
Visual: Large flakes of the old paint have ripped off the wall and are stuck to the tape.
-
Diagnosis: Delamination. The old paint layers are weak and losing adhesion. The weight of your new paint will pull the old paint off.
-
Action: Scrape and Sand. You cannot stabilise this. You must physically scrape the wall until you get back to a solid layer that doesn't lift with tape.
4. The "Cross-Hatch" Variant (For Gloss/Trim)
If you are painting over wood, metal, or previously glossed surfaces, you can use the more advanced Cross-Hatch Test.
-
Score a grid of vertical and horizontal lines (like a tic-tac-toe board) into the paint.
-
Apply tape over the grid.
-
Rip it off.
-
If the squares of paint stay on the door/wood, the adhesion is good. If the squares lift off on the tape, you haven't sanded/keyed the surface enough.
5. Where to Test?
Don't just test the best-looking part of the wall.
-
Test the problem areas: Near the skirting boards (rising damp risk).
-
Test the sun-bleached areas: South-facing walls usually have the chalkiest render.
-
Test the cracks: Around window frames where movement occurs.
Conclusion
Painting is 80% preparation and 20% application. The Tape Test is the only way to know if your prep is actually done.
-
Clean tape = Go
-
Dusty tape = Stabilise
-
Paint flakes = Scrape
Tape showing dust?
→ Lock it down with our Professional Masonry Stabilising Solutions.
Share:
Stabilising Primers: How to Fix Chalky and Dusty Masonry
Priming Porous Render: How to Stop Suction & Patchy Paint